
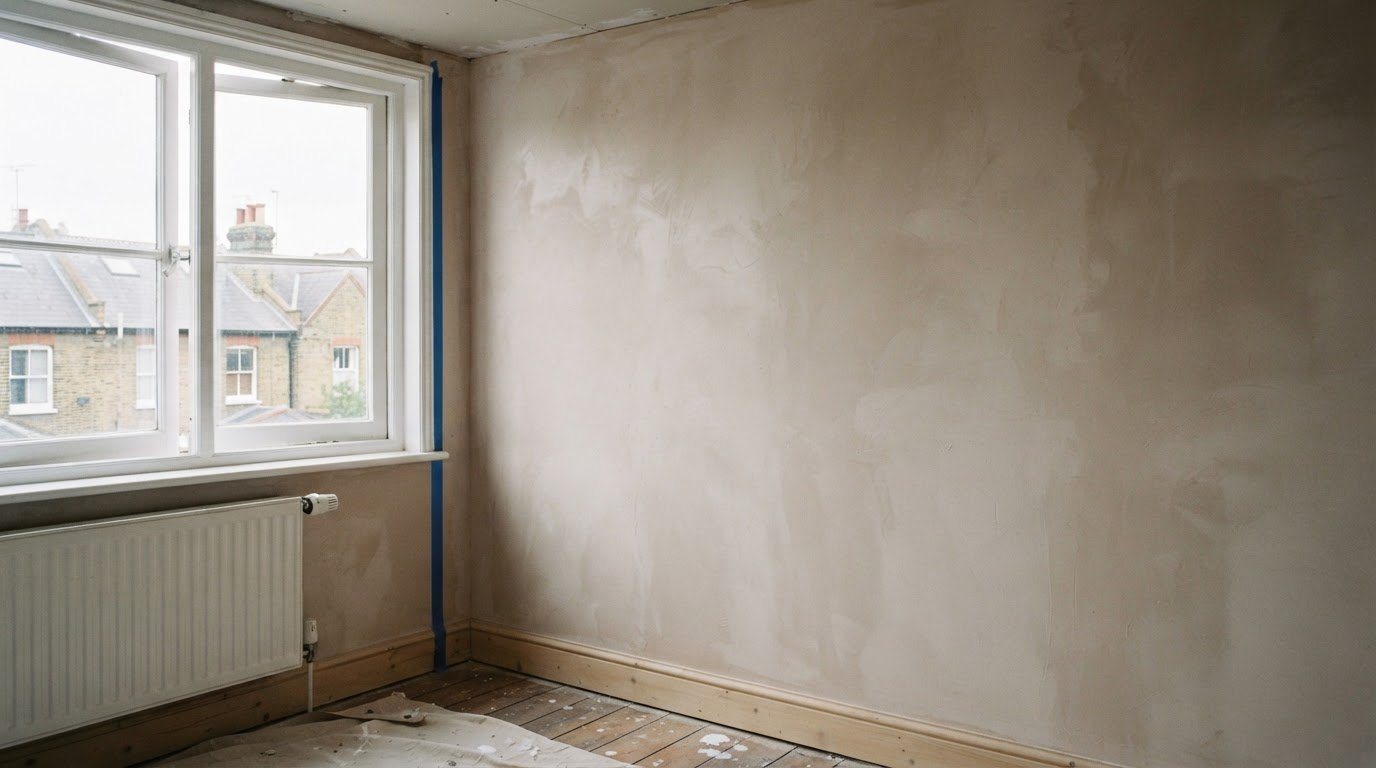
Faster drying isn’t better for fresh plaster. Preventing plaster cracking on new walls starts with allowing the plaster to dry gradually: keep the room at around 16 to 18 degrees Celsius, ventilate gently with windows slightly ajar and avoid high heating that could dry the surface too quickly. Some hairline cracking can still occur as plaster shrinks while drying.
It’s understandable to expect a new finish to stay smooth, especially when cracks appear soon after the work is complete. Drying is only part of the picture: preparation, building movement and reinforcement at vulnerable areas all affect whether cracks appear or return.
This article explains how to manage drying conditions, what different crack patterns may indicate and how mesh or fibres can support plaster. It also explains why recurring cracks need attention to their underlying cause, not simply another coat of filler.
Key Takeaways
- Protect fresh plaster and render from direct sunlight and strong wind, which can accelerate drying and increase shrinkage stress.
- Cracks above door frames, across ceilings or along board joints can point to movement, so their pattern helps identify the underlying cause.
- Mesh, scrim and fibres can reinforce vulnerable areas and help manage tension, though they cannot prevent every crack.
- When cracks return, assess the preparation, joints and surface beneath before choosing a repair, rather than simply filling the visible line.
How to prevent cracks in plaster and render?
Fresh plaster and render need controlled drying, sound preparation and suitable reinforcement. Preventing plaster cracking on new walls starts before application and continues until the finish is ready to decorate.
Managing plaster drying rates
Managing drying rates means limiting sudden heat, draughts and direct exposure as moisture leaves the surface. Rapid or uneven drying creates shrinkage stress, increasing the risk of hairline cracks. Keep the room around 16 to 18 degrees Celsius, and ventilate with windows slightly ajar. Avoid strong wind and direct sunlight. In warmer months, morning application reduces exposure to humid conditions. Avoid high heating, which can dry the surface too quickly.
Shrinkage in new properties
Shrinkage occurs as moisture leaves plaster, and vertical hairline cracks can appear as new properties dry and settle. Plaster types differ in how they cure, but none is immune to cracking. Lime plaster can continue curing and hardening for weeks or even months. A standard skim coat generally dries sooner, although the season and room conditions affect when it is ready. Preventing plaster cracking on new walls means allowing for these differences rather than assuming every material dries at the same rate.
Drying times and dehumidifiers
A standard skim coat may be ready for painting in as little as three days during summer. Damp or cold winter conditions can mean waiting over a week. Temperature, ventilation and moisture all affect drying. Don’t use a dehumidifier to force rapid drying. Wait until the plaster is uniformly light pink before painting, then apply a diluted mist coat before full-strength paint.
Preventing shrinkage and hairline cracks
Prepare the surface before application. Prime high-suction brickwork with watered-down PVA to slow how quickly the masonry absorbs water from fresh plaster. Apply plaster in two thin coats, allowing the first to firm up before applying the second. This supports an even finish rather than a rushed, thick layer. Careful preparation and controlled drying are central to preventing plaster cracking on new walls.
Reducing cracks caused by structural movement
Building movement can transfer stress to plaster and open cracks at weak points. A crack above a door frame, for example, may follow movement around the opening. Ceiling cracks can also develop when activity or stored furniture above shifts the structure. Plasterboard joints are another vulnerable area because movement can pull board edges apart.
Crack position and direction help distinguish movement-related damage from drying shrinkage. A fine vertical line on a new wall differs from a diagonal crack or a line that repeatedly follows a ceiling joint. Diagonal cracks can warrant closer assessment, particularly if they recur or appear alongside other signs of movement. Cracks measuring 15 mm to 25 mm are classed as serious and are often associated with structural damage.
- Above a door frame: inspect whether the line runs from a corner or follows the opening.
- Across a ceiling: consider movement above and whether the plasterboard joints are opening.
- Along a board joint: assess whether the joint has enough support and reinforcement.
- Diagonal across a wall: treat the pattern as urgent rather than as a surface defect.
Plasterboard fixing also affects how joints respond. If boards have too few screws, movement above a ceiling can flex the sheets and open their joints. Adding filler alone treats the visible line, not the movement that caused it. The joint needs sound support, and the surrounding area should be assessed before refinishing.
If cracks recur, record whether they are widening, extending or reappearing in the same place after repair. A crack that returns at a door corner or ceiling joint may point to continuing movement. Repairing the plaster before addressing the source risks another visible split. Wider cracks need particular attention, especially if they are diagonal or appear alongside movement around an opening.

Using mesh, hair and fibres for reinforcement
Reinforcement helps plaster or render manage tension as it dries. Fibres within a mix can absorb some tension and reduce the risk of shrinkage cracks. Mesh and scrim serve a different purpose: they reinforce vulnerable areas, such as plasterboard joints or an existing crack. Neither method prevents every crack, particularly when movement continues behind the finish.
Scrim tape is commonly used across plasterboard joints before finishing the surface. If a ceiling crack returns along an old line, missing scrim over the previous crack may be one reason. Reinforcing the joint helps adjoining edges act together beneath the plaster. The same principle applies to a known weak line: cover the area as part of the plastering work rather than filling only the visible split.
Fibres work through the plaster or render mix instead of bridging one specific joint. As the material dries, shrinkage creates tension; fibres can absorb some of it and help reduce cracking. Horsehair was historically used to provide this fibre effect. Modern mixes may contain fibres, but the appropriate reinforcement depends on the material and the area being finished. Reinforcement does not correct poor preparation or ongoing movement.
Choose reinforcement according to the risk and location. A plasterboard joint needs attention to the joint itself, while a previous crack may need scrim across its line before replastering. For a broad plaster or render surface, fibres can help manage drying stress throughout the mix. These measures support the finish, but cannot stabilise a moving wall or ceiling. If a crack is diagonal or keeps reopening after repair, identify its cause before covering it again. Matching reinforcement to the area helps reduce repeat cracking without treating every wall as if it had the same weakness.
Recurring cracks in plaster walls
A crack that returns after filling usually means the visible line was repaired without resolving its cause. On a newly plastered wall, check whether it follows a plasterboard joint, traces an existing crack or forms a new vertical line. These patterns can point to different issues, including missing joint reinforcement, poor preparation or continuing movement.
There is no single crack-width figure that determines whether plastering meets every UK project requirement. Requirements depend on the building work and project specification. Assess a crack by its pattern, width, recurrence and likely cause.
Preparation and application can contribute to repeat cracking. High-suction brickwork can draw water from plaster if it has not been primed. A second coat applied before the first firms up may also weaken the finish. Incorrectly mixed bonding material can leave weak areas. On plasterboard, a crack following a joint may indicate that scrim tape was not applied there. Tape supports the joint, but cannot rule out future movement.
Repair should follow the cause, not just the crack’s appearance. Let new plaster dry further before filling and repainting a fresh vertical crack. For a fine surface line, decorator’s caulk or joint compound may be used, then left to dry before sanding and redecorating. Wider-than-hairline cracks need assessment, particularly if they keep returning. A crack over 5 mm warrants professional attention; a diagonal pattern calls for urgent attention.
Where a crack reappears, note whether it is widening, extending or tracking a board joint. Replastering over a moving joint can leave the same line visible again. Address weak preparation, missing reinforcement or movement first, then select a compatible repair and finish. Discuss a recurring plaster crack before covering it again.
HD Construction: Plastering
HD Construction delivers plastering for new walls and refurbishment projects, where preparation and a consistent finish matter. If cracks recur, the cause may involve the substrate, a plasterboard joint or movement beneath the surface. Understanding the crack pattern helps determine whether the work needs a local repair or a broader review of the wall finish.
Where a project includes new partitions, HD Construction can coordinate plastering with drylining and taping and jointing. This connects the wall build-up and finishing work within the project scope, rather than treating each layer in isolation. Discuss your project with HD Construction when recurring cracks need attention or new walls require a plaster finish.
Contact HD Construction to discuss your plastering requirements.
Plan the next finish with confidence
A recurring crack is useful evidence, not simply a blemish to conceal. Before the next repair or fit-out, record where it appears, whether it follows a joint and whether it has changed. This information helps define the right scope of work and avoids treating the visible line without considering the wall behind it. A clear plan for preventing plaster cracking on new walls should account for the surface, its construction and the sequence of finishing work.
Where plastering forms part of a wider interior project, coordinate the wall finish with the surrounding construction. HD Construction’s work across plastering, drylining and SFS can support a joined-up approach to new wall assemblies, with the finish considered alongside the substrate.
For advice on your project or recurring cracks, contact HD Construction. A considered next step can help you move forward with a clear scope and a finish planned for the conditions of the space.
Frequently Asked Questions
How to stop plaster cracking when drying?
Limit sudden moisture loss rather than trying to speed up the job. Keep heating steady and avoid directing fans or a dehumidifier at the wall. Ventilate without creating a strong draught across the surface. If one area dries much faster than the rest, shrinkage may be uneven. Assess the wall across its full area before painting, rather than judging dryness from one patch.
Should You Worry About Cracks in Your Plaster Walls?
Hairline cracks can form as fresh plaster dries, but keep an eye on changes in their width, length and pattern. A crack that widens or returns after repair needs more attention than a stable fine line. Take cracks wider than 5 mm seriously, and treat diagonal cracks as needing urgent attention. The location and progression help distinguish a surface issue from movement that needs investigation.
What causes plaster to crack on new walls?
Cracks in new walls can result from drying shrinkage, building movement or weaknesses in preparation and application. For example, plasterboard stored in cold, damp conditions can absorb moisture, then swell and shrink as it dries in a warm home. A crack tracking a board joint may point to a jointing issue, while a line near an opening may relate to movement around that area.
What drying time is needed between plaster coats and before decorating?
Allow the first coat to firm up before applying the second, rather than relying on a fixed waiting time. Before decorating, a standard skim may be ready in as little as three days in summer, but damp or cold winter conditions can extend drying beyond a week. Check that the plaster is an even, pale pink before painting.
What temperature and humidity are best for plaster to dry without cracking?
Around 16 to 18 degrees Celsius is a suitable room temperature while fresh plaster dries. Avoid sharp temperature changes, direct sunlight and strong wind, which can dry the surface too quickly. Humidity affects drying speed, so maintain gentle ventilation rather than trying to remove moisture rapidly. Slightly ajar windows help refresh the room without exposing the wall to a strong draught.
Should scrim tape or mesh be used over joints and cracks before plastering?
Scrim tape is useful over plasterboard joints and old cracks because it reinforces the line beneath the finish. For example, a ceiling crack can return if the previous crack was plastered over without scrim. Mesh or scrim supports vulnerable areas, but cannot stop cracks caused by continuing movement. Address the source of a recurring crack before covering it with reinforcement and fresh plaster.